# 或使用下面的几行命令自动设置Homebrew export HOMEBREW_CORE_GIT_REMOTE="https://mirrors.tuna.tsinghua.edu.cn/git/homebrew/homebrew-core.git" for tap in core cask{,-fonts,-drivers,-versions} command-not-found; do brew tap --custom-remote --force-auto-update "homebrew/${tap}""https://mirrors.tuna.tsinghua.edu.cn/git/homebrew/homebrew-${tap}.git" done brew update
# 添加Remote的Profile设置 test -r ~/.bash_profile && echo'export HOMEBREW_BREW_GIT_REMOTE="https://mirrors.tuna.tsinghua.edu.cn/git/homebrew/brew.git"' >> ~/.bash_profile # bash test -r ~/.bash_profile && echo'export HOMEBREW_CORE_GIT_REMOTE="https://mirrors.tuna.tsinghua.edu.cn/git/homebrew/homebrew-core.git"' >> ~/.bash_profile test -r ~/.profile && echo'export HOMEBREW_BREW_GIT_REMOTE="https://mirrors.tuna.tsinghua.edu.cn/git/homebrew/brew.git"' >> ~/.profile test -r ~/.profile && echo'export HOMEBREW_CORE_GIT_REMOTE="https://mirrors.tuna.tsinghua.edu.cn/git/homebrew/homebrew-core.git"' >> ~/.profile
test -r ~/.zprofile && echo'export HOMEBREW_BREW_GIT_REMOTE="https://mirrors.tuna.tsinghua.edu.cn/git/homebrew/brew.git"' >> ~/.zprofile # zsh test -r ~/.zprofile && echo'export HOMEBREW_CORE_GIT_REMOTE="https://mirrors.tuna.tsinghua.edu.cn/git/homebrew/homebrew-core.git"' >> ~/.zprofile
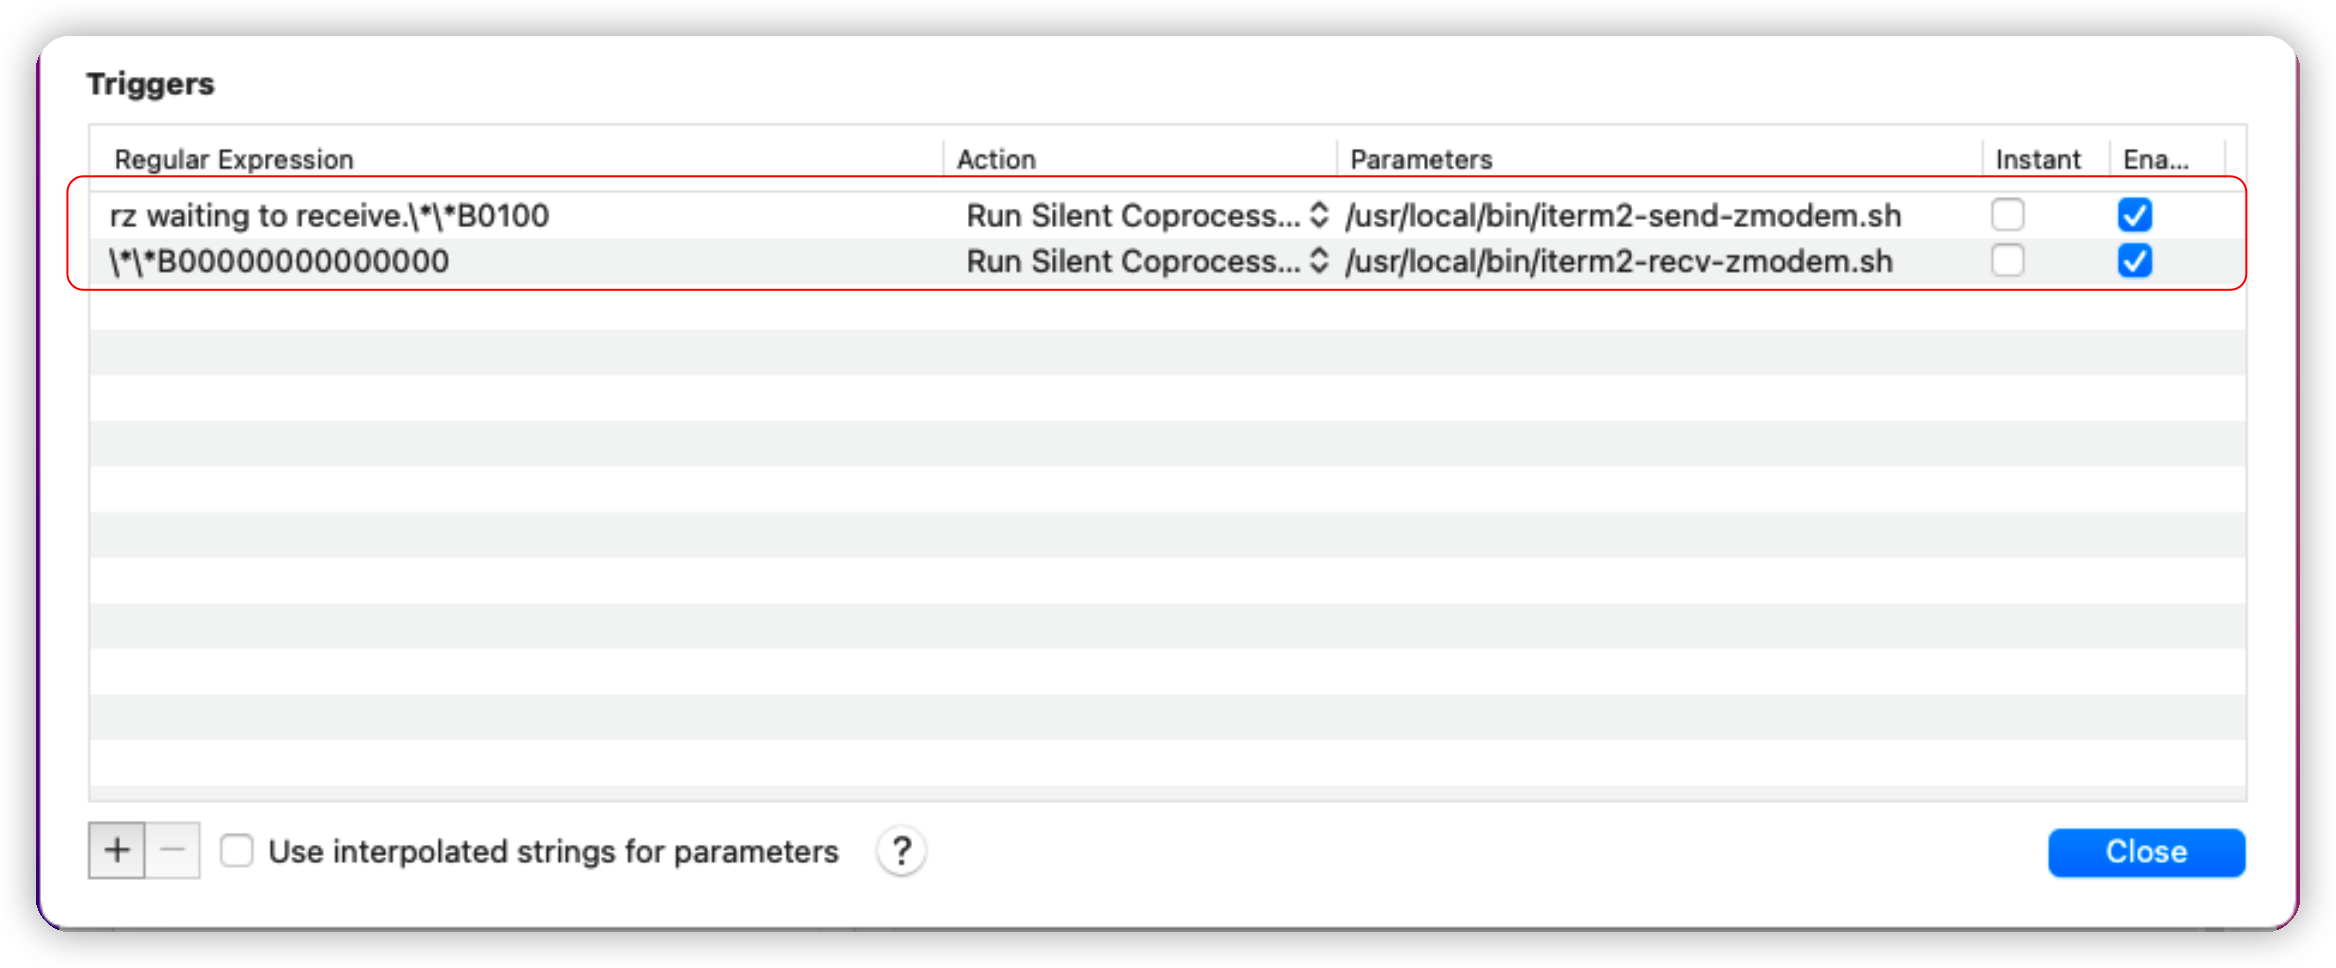
#!/bin/bash # Author: Matt Mastracci (matthew@mastracci.com) # AppleScript from http://stackoverflow.com/questions/4309087/cancel-button-on-osascript-in-a-bash-script # licensed under cc-wiki with attribution required # Remainder of script public domain
osascript -e 'tell application "iTerm2" to version' > /dev/null 2>&1 && NAME=iTerm2 || NAME=iTerm if [[ $NAME = "iTerm" ]]; then FILE=`osascript -e 'tell application "iTerm" to activate' -e 'tell application "iTerm" to set thefile to choose folder with prompt "Choose a folder to place received files in"' -e "do shell script (\"echo \"&(quoted form of POSIX path of thefile as Unicode text)&\"\")"` else FILE=`osascript -e 'tell application "iTerm2" to activate' -e 'tell application "iTerm2" to set thefile to choose folder with prompt "Choose a folder to place received files in"' -e "do shell script (\"echo \"&(quoted form of POSIX path of thefile as Unicode text)&\"\")"` fi
if [[ $FILE = "" ]]; then echo Cancelled. # Send ZModem cancel echo -e \\x18\\x18\\x18\\x18\\x18 sleep 1 echo echo \# Cancelled transfer else cd"$FILE" /usr/local/bin/rz -E -e -b sleep 1 echo echo echo \# Sent \-\> $FILE fi
#!/bin/bash
# Author: Matt Mastracci (matthew@mastracci.com)
# AppleScript from http://stackoverflow.com/questions/4309087/cancel-button-on-osascript-in-a-bash-script
# licensed under cc-wiki with attribution required
# Remainder of script public domain

osascript -e 'tell application "iTerm2" to version' > /dev/null 2>&1 && NAME=iTerm2 || NAME=iTerm
if [[ $NAME = "iTerm" ]]; then
    FILE=`osascript -e 'tell application "iTerm" to activate' -e 'tell application "iTerm" to set thefile to choose file with prompt "Choose a file to send"' -e "do shell script (\"echo \"&(quoted form of POSIX path of thefile as Unicode text)&\"\")"`
else
    FILE=`osascript -e 'tell application "iTerm2" to activate' -e 'tell application "iTerm2" to set thefile to choose file with prompt "Choose a file to send"' -e "do shell script (\"echo \"&(quoted form of POSIX path of thefile as Unicode text)&\"\")"`
fi
if [[ $FILE = "" ]]; then
    echo Cancelled.
    # Send ZModem cancel
    echo -e \\x18\\x18\\x18\\x18\\x18
    sleep 1
    echo
    echo \# Cancelled transfer
else
    /usr/local/bin/sz "$FILE" -e -b
    sleep 1
    echo
    echo \# Received $FILE
fi
# See this wiki page for more info: # https://github.com/dylanaraps/neofetch/wiki/Customizing-Info print_info() { info title info underline
info "操作系统" distro info "型号信息" model info "内核版本" kernel info "开机时间"uptime # info "已 安 装" packages info "Sh 类 型" shell info "分 辨 率" resolution # info "DE" de # info "WM" wm # info "WM Theme" wm_theme # info "Theme" theme # info "Icons" icons info "终端名称" term info "终端字体" term_font info "CPU信 息" cpu info "GPU信 息" gpu info "内存信息" memory
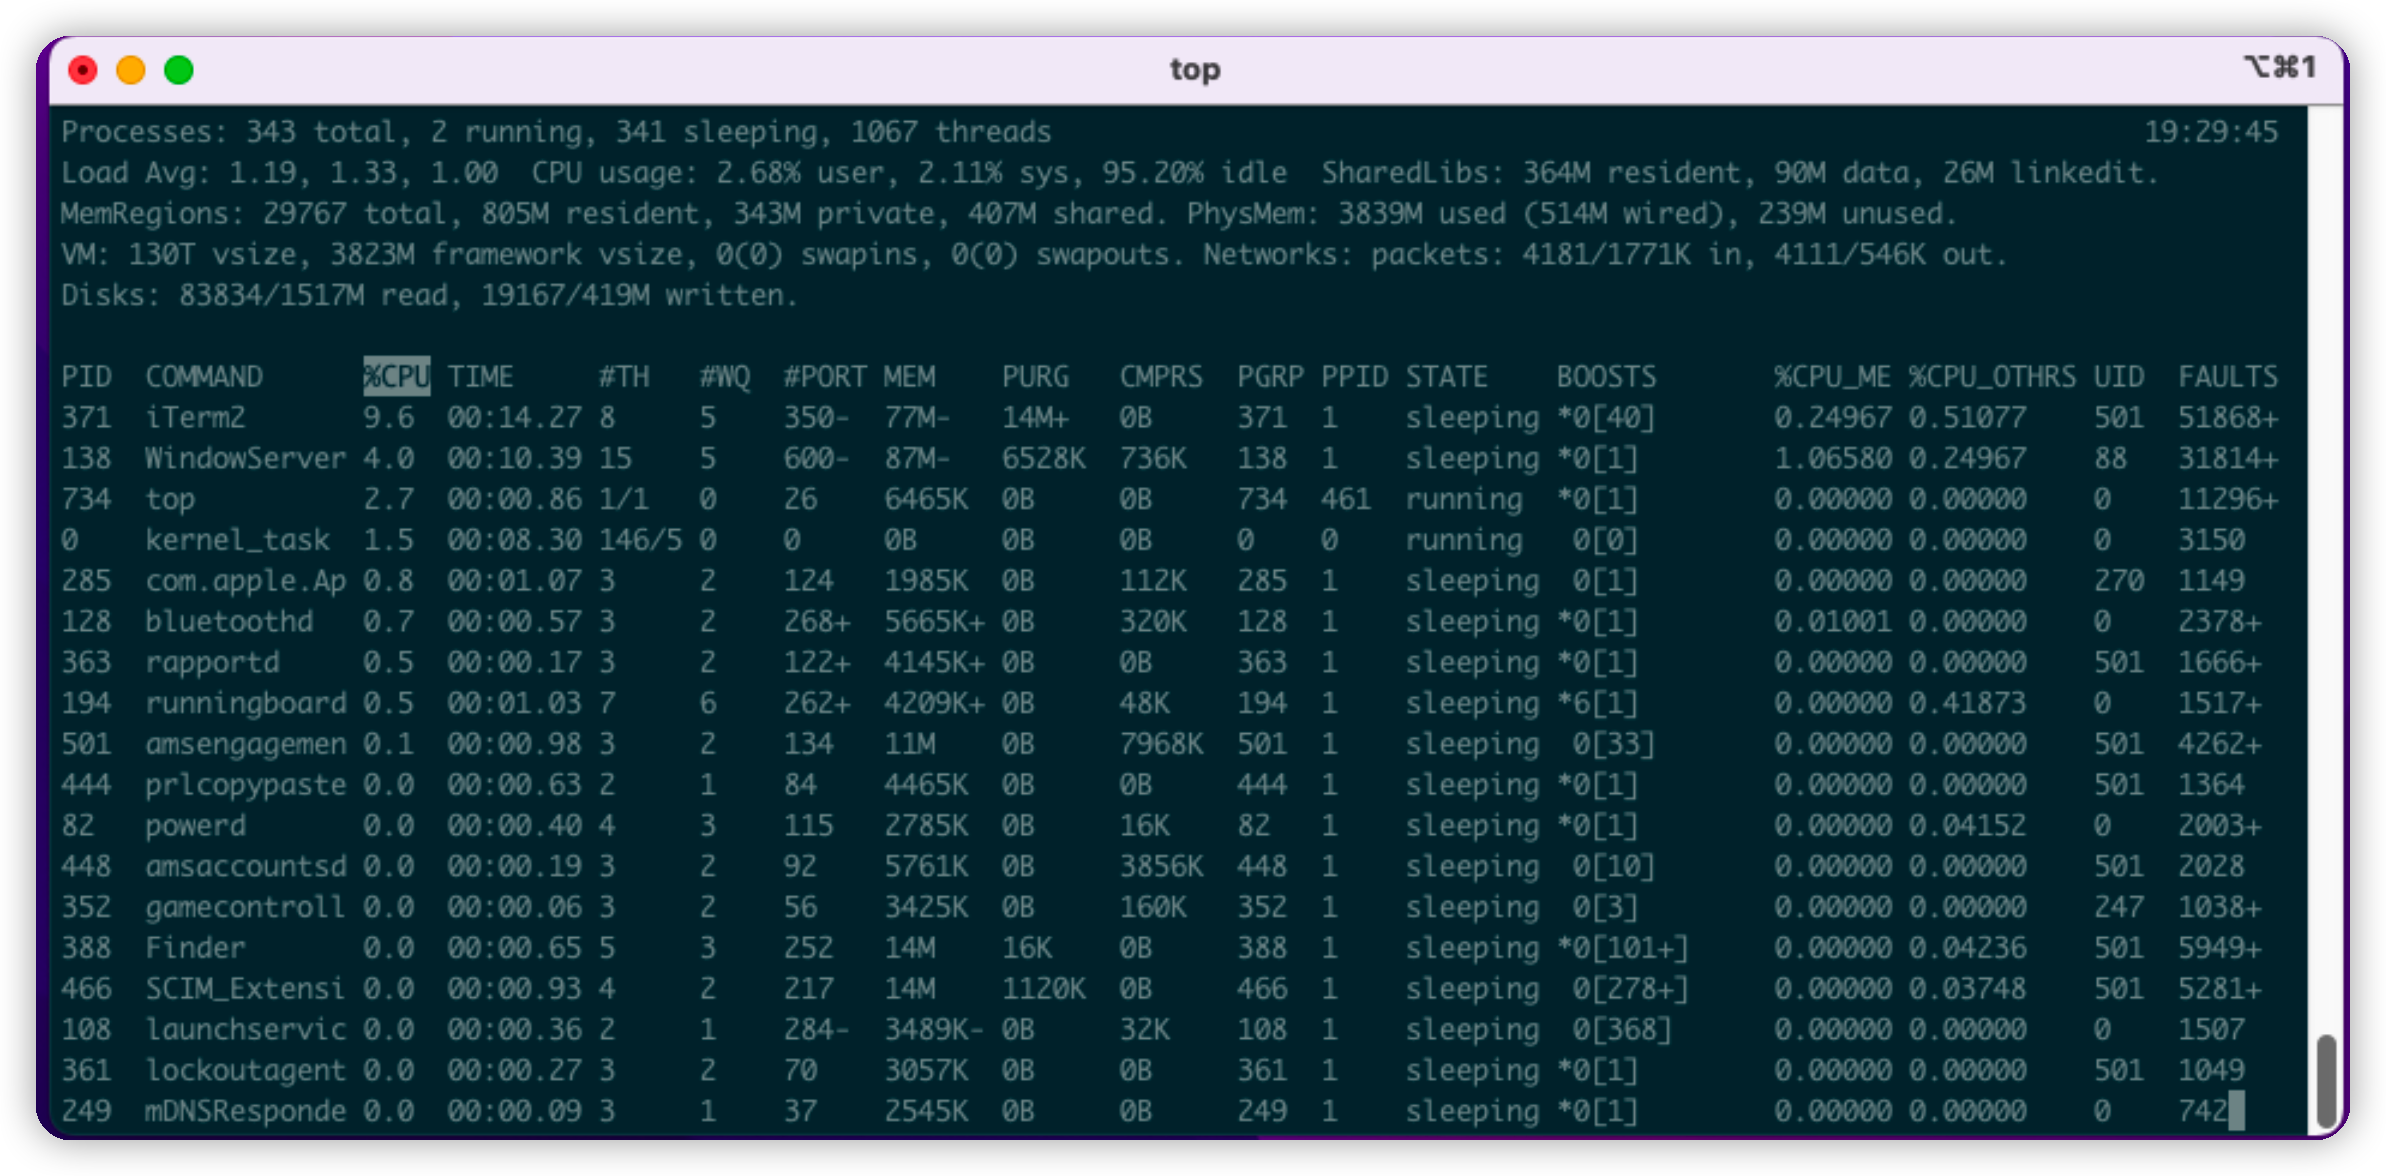
# info "GPU Driver" gpu_driver # Linux/macOS only # info "CPU Usage" cpu_usage # info "磁盘信息" disk info "电池信息" battery # info "Font" font # info "Song" song # [[ "$player" ]] && prin "Music Player" "$player" info "内网地址" local_ip info "公网地址" public_ip # info "Users" users # info "Locale" locale # This only works on glibc systems.
# Shorten the output of the kernel function. # # Default: 'on' # Values: 'on', 'off' # Flag: --kernel_shorthand # Supports: Everything except *BSDs (except PacBSD and PC-BSD) # # Example: # on: '4.8.9-1-ARCH' # off: 'Linux 4.wa 7745 # .9-1-ARCH' kernel_shorthand="on"
# Distro
# Shorten the output of the distro function # # Default: 'off' # Values: 'on', 'tiny', 'off' # Flag: --distro_shorthand # Supports: Everything except Windows and Haiku distro_shorthand="off"
# Show/Hide OS Architecture. # Show 'x86_64', 'x86' and etc in 'Distro:' output. # # Default: 'on' # Values: 'on', 'off' # Flag: --os_arch # # Example: # on: 'Arch Linux x86_64' # off: 'Arch Linux' os_arch="on"
# Uptime
# Shorten the output of the uptime function # # Default: 'on' # Values: 'on', 'tiny', 'off' # Flag: --uptime_shorthand # # Example: # on: '2 days, 10 hours, 3 mins' # tiny: '2d 10h 3m' # off: '2 days, 10 hours, 3 minutes' uptime_shorthand="on"
# Show the path to $SHELL # # Default: 'off' # Values: 'on', 'off' # Flag: --shell_path # # Example: # on: '/bin/bash' # off: 'bash' shell_path="on"
# Show $SHELL version # # Default: 'on' # Values: 'on', 'off' # Flag: --shell_version # # Example: # on: 'bash 4.4.5' # off: 'bash' shell_version="on"
# CPU
# CPU speed type # # Default: 'bios_limit' # Values: 'scaling_cur_freq', 'scaling_min_freq', 'scaling_max_freq', 'bios_limit'. # Flag: --speed_type # Supports: Linux with 'cpufreq' # NOTE: Any file in '/sys/devices/system/cpu/cpu0/cpufreq' can be used as a value. speed_type="bios_limit"
# CPU speed shorthand # # Default: 'off' # Values: 'on', 'off'. # Flag: --speed_shorthand # NOTE: This flag is not supported in systems with CPU speed less than 1 GHz # # Example: # on: 'i7-6500U (4) @ 3.1GHz' # off: 'i7-6500U (4) @ 3.100GHz' speed_shorthand="off"
# Enable/Disable CPU brand in output. # # Default: 'on' # Values: 'on', 'off' # Flag: --cpu_brand # # Example: # on: 'Intel i7-6500U' # off: 'i7-6500U (4)' cpu_brand="on"
# Website to ping for the public IP # # Default: 'http://ident.me' # Values: 'url' # Flag: --ip_host public_ip_host="http://ident.me"
# Public IP timeout. # # Default: '2' # Values: 'int' # Flag: --ip_timeout public_ip_timeout=2
# Desktop Environment
# Show Desktop Environment version # # Default: 'on' # Values: 'on', 'off' # Flag: --de_version de_version="on"
# Disk
# Which disks to display. # The values can be any /dev/sdXX, mount point or directory. # NOTE: By default we only show the disk info for '/'. # # Default: '/' # Values: '/', '/dev/sdXX', '/path/to/drive'. # Flag: --disk_show # # Example: # disk_show=('/' '/dev/sdb1'): # 'Disk (/): 74G / 118G (66%)' # 'Disk (/mnt/Videos): 823G / 893G (93%)' # # disk_show=('/'): # 'Disk (/): 74G / 118G (66%)' # disk_show=('/')
# Format to display song information. # # Default: '%artist% - %album% - %title%' # Values: '%artist%', '%album%', '%title%' # Flag: --song_format # # Example: # default: 'Song: Jet - Get Born - Sgt Major' song_format="%artist% - %album% - %title%"
# Print the Artist, Album and Title on separate lines # # Default: 'off' # Values: 'on', 'off' # Flag: --song_shorthand # # Example: # on: 'Artist: The Fratellis' # 'Album: Costello Music' # 'Song: Chelsea Dagger' # # off: 'Song: The Fratellis - Costello Music - Chelsea Dagger' song_shorthand="off"
# Text Colors # # Default: 'distro' # Values: 'distro', 'num' 'num' 'num' 'num' 'num' 'num' # Flag: --colors # # Each number represents a different part of the text in # this order: 'title', '@', 'underline', 'subtitle', 'colon', 'info' # # Example: # colors=(distro) - Text is colored based on Distro colors. # colors=(4 6 1 8 8 6) - Text is colored in the order above. colors=(distro)
# Color block width in spaces # # Default: '3' # Values: 'num' # Flag: --block_width block_width=3
# Color block height in lines # # Default: '1' # Values: 'num' # Flag: --block_height block_height=1
# Color Alignment # # Default: 'auto' # Values: 'auto', 'num' # Flag: --col_offset # # Number specifies how far from the left side of the terminal (in spaces) to # begin printing the columns, in case you want to e.g. center them under your # text. # Example: # col_offset="auto" - Default behavior of neofetch # col_offset=7 - Leave 7 spaces then print the colors col_offset="auto"
# Image Source # # Which image or ascii file to display. # # Default: 'auto' # Values: 'auto', 'ascii', 'wallpaper', '/path/to/img', '/path/to/ascii', '/path/to/dir/' # 'command output (neofetch --ascii "$(fortune | cowsay -W 30)")' # Flag: --source # # NOTE: 'auto' will pick the best image source for whatever image backend is used. # In ascii mode, distro ascii art will be used and in an image mode, your # wallpaper will be used. image_source="wallpaper"
# Ascii Colors # # Default: 'distro' # Values: 'distro', 'num' 'num' 'num' 'num' 'num' 'num' # Flag: --ascii_colors # # Example: # ascii_colors=(distro) - Ascii is colored based on Distro colors. # ascii_colors=(4 6 1 8 8 6) - Ascii is colored using these colors. ascii_colors=(distro)
# Bold ascii logo # Whether or not to bold the ascii logo. # # Default: 'on' # Values: 'on', 'off' # Flag: --ascii_bold ascii_bold="on"
# Image Options
# Image loop # Setting this to on will make neofetch redraw the image constantly until # Ctrl+C is pressed. This fixes display issues in some terminal emulators. # # Default: 'off' # Values: 'on', 'off' # Flag: --loop image_loop="off"
# Crop mode # # Default: 'normal' # Values: 'normal', 'fit', 'fill' # Flag: --crop_mode # # See this wiki page to learn about the fit and fill options. # https://github.com/dylanaraps/neofetch/wiki/What-is-Waifu-Crop%3F crop_mode="fill"
# Image size # The image is half the terminal width by default. # # Default: 'auto' # Values: 'auto', '00px', '00%', 'none' # Flags: --image_size # --size image_size="300px"
# Gap between image and text # # Default: '3' # Values: 'num', '-num' # Flag: --gap gap=3
# Image offsets # Only works with the w3m backend. # # Default: '0' # Values: 'px' # Flags: --xoffset # --yoffset yoffset=0 xoffset=0
# Image background color # Only works with the w3m backend. # # Default: '' # Values: 'color', 'blue' # Flag: --bg_color background_color=
# Misc Options
# Stdout mode # Turn off all colors and disables image backend (ASCII/Image). # Useful for piping into another command. # Default: 'off' # Values: 'on', 'off' stdout="off"